One of the things I have loved most about slowing down life has been cooking with my kids. I've never really had the time (or so I thought) or the patience (because I was in such a hurry) to let them help me much. Which really, when I think about it, is very sad. They all love to cook! (Well, everyone except my oldest, who only wants to roll sushi.) But I was never letting them have the joy or experience of cooking. So now, I find myself being purposeful about cooking with each of them. And it has been amazing.
I do have some rules that they each follow.
1. One at a time, preferably, is all I can sanely teach.
2. If they are going to help cook, they are required to help clean up after we are finished.
3. And if there is something specific they want to make (besides just assisting with my pre-planned meals), they absolutely must tell me in advance and put the ingredients on my grocery list. I still do not love scrambling to make something that I'm not prepared for!
Beyond those things, there aren't too many other rules. Just go slow, listen, and have fun. Oh, and music. We must have music playing!
It was my handsome young man's turn to cook with me, so I told him to think about what he'd like to fix for his supper meal. It didn't take much thinking. He wanted to make homemade chicken pot pie - one of my favorites! We made everything from scratch. It took 2 hours, plus bake time, to make this baby, which gave him a new appreciation for the work that goes into cooking good food for your family. But in the end, it was worth every minute! We spent time together, he learned a lot, he had fun, and everybody raved over his meal that he cooked.
Here is the recipe, in case you'd like to take time with your own kids (or maybe just by yourself in the quiet!) to make this delicious supper.
Start with a really big pot. You'll need to boil your chicken and make homemade chicken broth, so it needs to be big enough for all of it to fit.

Rinse the chicken well. If there is a packet of giblets inside the cavity, take it out. Throw it away! Seriously, I can't even understand why anybody would eat all of that!
This was his first time dealing with raw chicken. It was not pleasant for him.

Put the chicken in the huge pot, give it a good douse of salt, and cover it with water. Turn your stove top on high until it starts to boil. At that point, cut the heat down until it is just simmering. If you forget to do that step, it will foam and boil over on your stove, and let me just tell you, there is no more horrid smell than boiled-over-burnt-chicken!
As the chicken cooks, the water will boil out all the good stuff from the marrow of the chicken bones. This leaves you with a fabulous homemade broth! (Some of the broth we used for this recipe, and I froze the rest in gallon bags to use in soups later.)

Next, mix up your pie crust. Since our chicken pot pie was going to have a crust on the bottom and covering the top, we made a bigger batch of crust.
We used:
3 Cups all-purpose flour
1/2 to 1 tsp salt
1 Cup Crisco shortening
Mix all of these together with a pastry cutter, fork, or your fingers until it's nice and crumbly.
Then add:
10-12 Tablespoons of ice cold water.
Mix in the water until you have a nice, soft dough. Cover it with plastic wrap and stick it in the fridge to rest until you are ready to roll it out.


When the crust is finished, get your eggs started. Boil 4-6 eggs.

Peel and cut up 4-6 potatoes, or however many you'd like. Some potatoes are smaller and you might need a few more. Cut them into bite-size chunks. Cover them with water, and put them on the stove top to simmer. Keep an eye on these, because they will foam and boil over on you in a heartbeat!


Big sister to the rescue! We were working on other parts of the pie and she came in right as it was about to boil over!
When your potatoes are cooked (you can poke them with a fork and it slides in easily), drain them in a colander and let them cool while you work on the next things.

Peel and cut up 2-4 carrots (more or less, depending on your family's taste.) Drop 'em in a nice cast iron skillet. No worries if you don't have one. Any skillet will do.

To the carrots, add an onion chopped up small and a whole stick of BUTTER! Saute all of these around for a few minutes until the butter is nicely melted and the onions are clear. (The carrots will continue to cook during the final bake, so don't worry if they are still a little crunchy here.) Add in 1/4 Cup of all-purpose flour. Mix it in really good, because this is your thickener and you don't want lumps.

Your chicken should have been cooking for about 45 minutes and should be cooked by this point. The way you tell is to see if the leg tries to break apart from the rest of the bird as you lift it out of the pot. If it's done, the whole thing should really be falling apart! (No, this is not a scientific way to "test doneness", and I'm sure some of you out there are gasping at my complete disregard for meat thermometers. But trust me, this works!)
Put your chicken in a bowl or somewhere it can cool. When you can touch it without burning your fingers off, peel off the skin and start taking the meat off the bones. For this recipe, I used about half of the meat from this bird, and I froze the rest for later use.

All of your ingredients are ready now! Grab another big bowl and start tossing stuff in.
1. Dump in your cooled potatoes.
2. Add your carrot/onion/butter mixture.
3. Chop up 4-6 eggs (however many you want) on top of that.
4. Add in a can of store-bought Lesueur English peas and a can of cream of chicken soup .
5. And finally, put your chicken on top of everything.
(Don't forget salt and pepper!!)
With a big spoon or spatula, start mixing it all together. It will be a little "dry", so pour in a little bit of your homemade chicken broth and milk - SLOWLY! You don't want to get too much and make soup! But if you add about a half cup at a time, you can judge it for moistness very easily. Just alternate between the broth and milk until it looks nice.
Time to pull that crust out of the fridge! Roll out half of the dough into a nice, long rectangle that will be big enough to fit in the bottom of your pan and hang over the sides a bit.

Pour all of your filling into the pan. Smooth it out nicely so it all fits well. If you have too much, no worries! You can freeze the extra or just stick it in a container in the fridge to eat later as-is. It's that good!
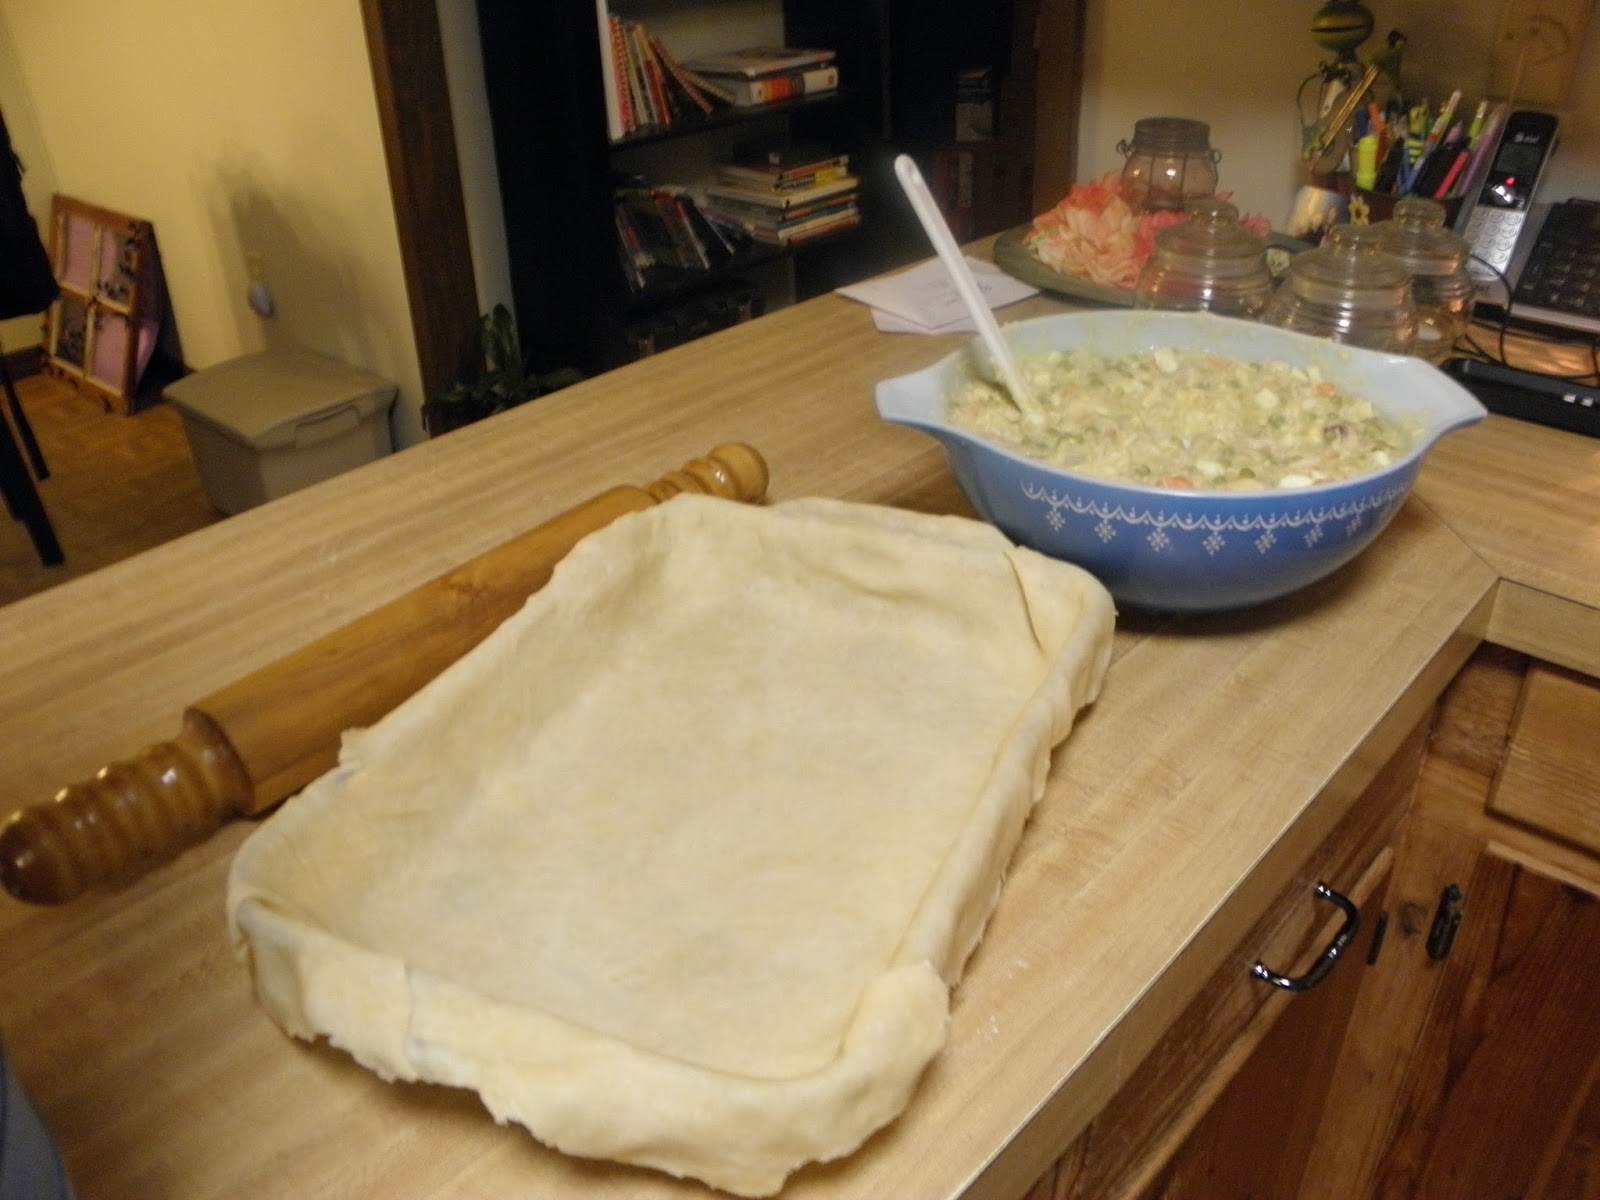


Roll out the second half of the dough into a slightly smaller rectangle than the first. Lay it on top of the filling, and try to get it covering the whole top. Take the dough hanging over the sides and just fold it up over the top. You can take a little water on the end of your finger and "seal" the dough so it's less likely that the filling will cook out.
Poke some holes in the top so the steam can get out. You can just poke them randomly or make a lovely pattern. My handsome guy is quite artistic, so he opted to make a pattern.

This is what it should look like. Pop it in the oven at 375 for 45 minutes to an hour. Ours took closer to an hour to finish.

Really, everything in the pie (except the crust) is already cooked when you put it in the oven. So what you're really waiting for here is just a nice, golden brown crust. It takes awhile to achieve this perfection! So just go clean the kitchen or take a break while you wait. Don't rush!
This is what it should look like when you pull it out. Give it a few minutes to cool before you dig into it - if you can wait that long!


One thing we decided to do differently next time we make this - we'll make a double batch! This takes so long to get everything ready and make it all from scratch. So it would have been great to just double it and stick one in the freezer. If you do decide to freeze one, do so before the final bake. Just make sure you cover it well, and pull it out of your freezer the morning you want to cook it for supper. It will be thawed and ready to go by the time you are ready to cook it. It will still take almost an hour to cook, though, so plan for that.
This was so worth all the work! Everyone absolutely loved it, even my baby girl who doesn't like anything even close to this, and they all bragged about how great he did. And the whole chicken pot pie was GONE within 2 days!
I hope you'll try this recipe for your family sometime. If you do, come back here and let me know how it went! I'd love to hear your story!
No comments:
Post a Comment