Showing posts with label slow food. Show all posts

Monday, August 8, 2016

Slow Food: Chicken Pot Pie

One of the things I have loved most about slowing down life has been cooking with my kids. I've never really had the time (or so I thought) or the patience (because I was in such a hurry) to let them help me much. Which really, when I think about it, is very sad. They all love to cook! (Well, everyone except my oldest, who only wants to roll sushi.) But I was never letting them have the joy or experience of cooking. So now, I find myself being purposeful about cooking with each of them. And it has been amazing.  

I do have some rules that they each follow. 
1. One at a time, preferably, is all I can sanely teach. 
2. If they are going to help cook, they are required to help clean up after we are finished. 
3. And if there is something specific they want to make (besides just assisting with my pre-planned meals), they absolutely must tell me in advance and put the ingredients on my grocery list. I still do not love scrambling to make something that I'm not prepared for!

Beyond those things, there aren't too many other rules. Just go slow, listen, and have fun. Oh, and music. We must have music playing! 

It was my handsome young man's turn to cook with me, so I told him to think about what he'd like to fix for his supper meal. It didn't take much thinking. He wanted to make homemade chicken pot pie - one of my favorites! We made everything from scratch. It took 2 hours, plus bake time, to make this baby, which gave him a new appreciation for the work that goes into cooking good food for your family. But in the end, it was worth every minute! We spent time together, he learned a lot, he had fun, and everybody raved over his meal that he cooked. 

Here is the recipe, in case you'd like to take time with your own kids (or maybe just by yourself in the quiet!) to make this delicious supper. 


Start with a really big pot. You'll need to boil your chicken and make homemade chicken broth, so it needs to be big enough for all of it to fit. 


Rinse the chicken well. If there is a packet of giblets inside the cavity, take it out. Throw it away! Seriously, I can't even understand why anybody would eat all of that! 

This was his first time dealing with raw chicken. It was not pleasant for him. 


Put the chicken in the huge pot, give it a good douse of salt, and cover it with water. Turn your stove top on high until it starts to boil. At that point, cut the heat down until it is just simmering. If you forget to do that step, it will foam and boil over on your stove, and let me just tell you, there is no more horrid smell than boiled-over-burnt-chicken! 

As the chicken cooks, the water will boil out all the good stuff from the marrow of the chicken bones. This leaves you with a fabulous homemade broth! (Some of the broth we used for this recipe, and I froze the rest in gallon bags to use in soups later.)


Next, mix up your pie crust. Since our chicken pot pie was going to have a crust on the bottom and covering the top, we made a bigger batch of crust. 

We used:
3 Cups all-purpose flour
1/2 to 1 tsp salt
1 Cup Crisco shortening
Mix all of these together with a pastry cutter, fork, or your fingers until it's nice and crumbly.
Then add:
10-12 Tablespoons of ice cold water. 
Mix in the water until you have a nice, soft dough. Cover it with plastic wrap and stick it in the fridge to rest until you are ready to roll it out.


When the crust is finished, get your eggs started. Boil 4-6 eggs.


Peel and cut up 4-6 potatoes, or however many you'd like. Some potatoes are smaller and you might need a few more. Cut them into bite-size chunks. Cover them with water, and put them on the stove top to simmer. Keep an eye on these, because they will foam and boil over on you in a heartbeat! 


Big sister to the rescue! We were working on other parts of the pie and she came in right as it was about to boil over! 

When your potatoes are cooked (you can poke them with a fork and it slides in easily), drain them in a colander and let them cool while you work on the next things. 


Peel and cut up 2-4 carrots (more or less, depending on your family's taste.) Drop 'em in a nice cast iron skillet. No worries if you don't have one. Any skillet will do. 


To the carrots, add an onion chopped up small and a whole stick of BUTTER! Saute all of these around for a few minutes until the butter is nicely melted and the onions are clear. (The carrots will continue to cook during the final bake, so don't worry if they are still a little crunchy here.) Add in 1/4 Cup of all-purpose flour. Mix it in really good, because this is your thickener and you don't want lumps. 


Your chicken should have been cooking for about 45 minutes and should be cooked by this point. The way you tell is to see if the leg tries to break apart from the rest of the bird as you lift it out of the pot. If it's done, the whole thing should really be falling apart! (No, this is not a scientific way to "test doneness", and I'm sure some of you out there are gasping at my complete disregard for meat thermometers. But trust me, this works!) 

Put your chicken in a bowl or somewhere it can cool. When you can touch it without burning your fingers off, peel off the skin and start taking the meat off the bones. For this recipe, I used about half of the meat from this bird, and I froze the rest for later use. 


All of your ingredients are ready now! Grab another big bowl and start tossing stuff in. 
1. Dump in your cooled potatoes. 
2. Add your carrot/onion/butter mixture. 
3. Chop up 4-6 eggs (however many you want) on top of that. 
4. Add in a can of store-bought Lesueur English peas and a can of cream of chicken soup . 
5. And finally, put your chicken on top of everything. 
(Don't forget salt and pepper!!) 
With a big spoon or spatula, start mixing it all together. It will be a little "dry", so pour in a little bit of your homemade chicken broth and milk - SLOWLY! You don't want to get too much and make soup! But if you add about a half cup at a time, you can judge it for moistness very easily. Just alternate between the broth and milk until it looks nice. 

Time to pull that crust out of the fridge! Roll out half of the dough into a nice, long rectangle that will be big enough to fit in the bottom of your pan and hang over the sides a bit. 


Pour all of your filling into the pan. Smooth it out nicely so it all fits well. If you have too much, no worries! You can freeze the extra or just stick it in a container in the fridge to eat later as-is. It's that good!
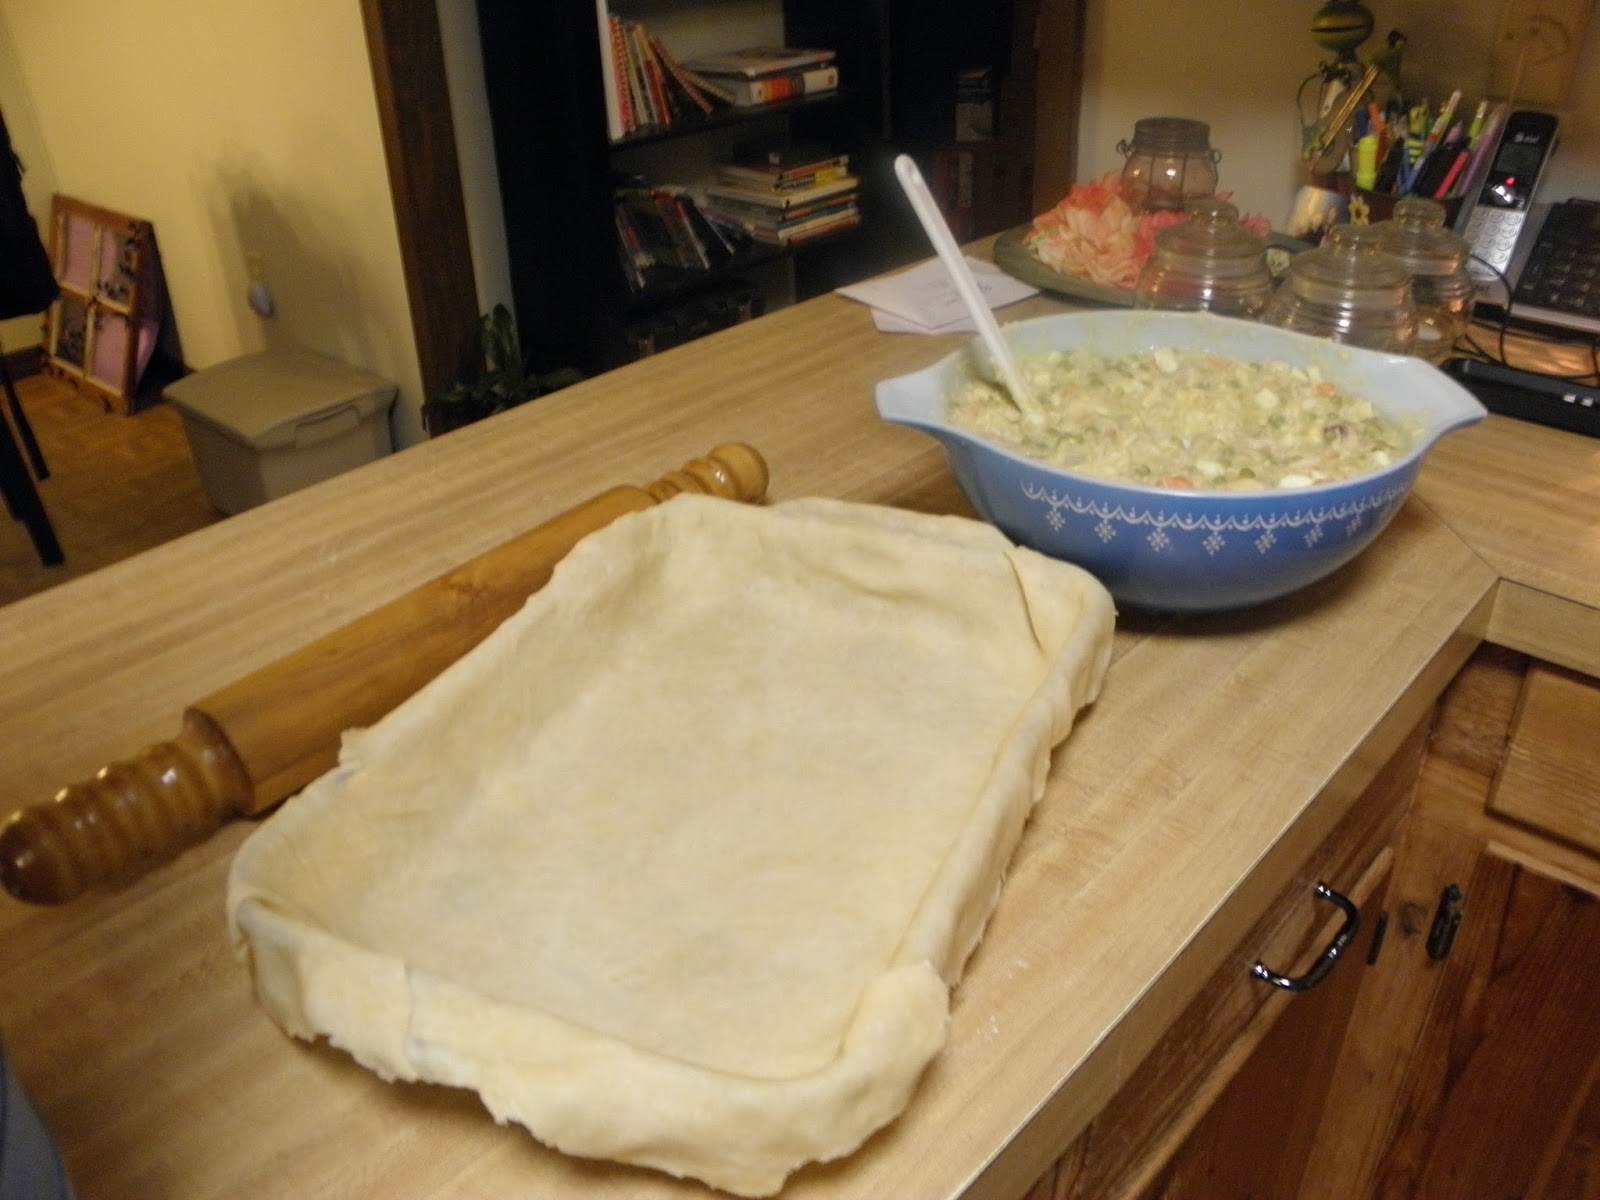


Roll out the second half of the dough into a slightly smaller rectangle than the first. Lay it on top of the filling, and try to get it covering the whole top. Take the dough hanging over the sides and just fold it up over the top. You can take a little water on the end of your finger and "seal" the dough so it's less likely that the filling will cook out. 

Poke some holes in the top so the steam can get out. You can just poke them randomly or make a lovely pattern. My handsome guy is quite artistic, so he opted to make a pattern.


This is what it should look like. Pop it in the oven at 375 for 45 minutes to an hour. Ours took closer to an hour to finish. 


Really, everything in the pie (except the crust) is already cooked when you put it in the oven. So what you're really waiting for here is just a nice, golden brown crust. It takes awhile to achieve this perfection! So just go clean the kitchen or take a break while you wait. Don't rush!

This is what it should look like when you pull it out. Give it a few minutes to cool before you dig into it - if you can wait that long! 


One thing we decided to do differently next time we make this - we'll make a double batch! This takes so long to get everything ready and make it all from scratch. So it would have been great to just double it and stick one in the freezer. If you do decide to freeze one, do so before the final bake. Just make sure you cover it well, and pull it out of your freezer the morning you want to cook it for supper. It will be thawed and ready to go by the time you are ready to cook it. It will still take almost an hour to cook, though, so plan for that. 

This was so worth all the work! Everyone absolutely loved it, even my baby girl who doesn't like anything even close to this, and they all bragged about how great he did. And the whole chicken pot pie was GONE within 2 days! 

I hope you'll try this recipe for your family sometime. If you do, come back here and let me know how it went! I'd love to hear your story!


Friday, July 22, 2016

Southern Slow Food: Pecan Praline Sweet Rolls

I live in the Deep South where pecans are abundant. Every year, the kids and I try to go and pick up pecans from some lovely soul's home or business. To keep the kids interested while doing the monotonous work of pecan picking, I tell them it's like hunting for Easter eggs, so they'd better get to it! The one with the most pecans wins! May I just say, it never works. Pecans are not lovely eggs filled with chocolates, and the kids soon get bored and I am left to do the work - which I do not love. So usually, we end up just buying some at a local produce stand.  I try to get enough for the entire year, because, well, they are only in season for a short time and you'd better get them while you can! And there are SO many amazing foods to be made using pecans!

One of my favorite things is pecan praline. You can make this yummy, sugary stuff into a syrup to put over pancakes, candies that melt in your mouth and cause you to hear angels singing, or, my favorite, a topping/glaze for baked things!

Today, I want to share another of my favorite Southern slow foods - pecan praline sweet rolls! These lovelies are just amazing! Granted, it takes several hours to make these, but they are definitely worth it! Plus, if you make these over the weekend, you can surprise your family with a lovely Sunday morning breakfast before heading out to church. THAT, my friends, is a WIN!

Start out by scalding 1C of milk. If, like me, you had no idea what "scalding milk" is, let me explain. You are going for milk that has been heated to almost boiling, but not quite boiling. Use a whisk to keep it from burning to the bottom of your pot (which it will do very quickly!!), and also to get the milk nice and frothy! It should look like this when you're done. 


Take the pot off the heat, and drop in half a stick of butter (use REAL BUTTER here, people!). Let the milk cool down and the butter melt while you work on the next few steps. 


In a Pyrex measuring container (or a bowl), add 2 packages of active dry yeast, 1 Tablespoon of sugar (white or brown), and 2/3C warm (NOT HOT) water. If your water is too hot, it will kill your yeast and your rolls won't rise! Better to be on the cooler side than too hot!

This is what the mixture starts out looking like.


And this is what you have after 5-10 min. This is what you are going for. 


While your yeast mixture is rising and your scalded milk is cooling, mix together 2 eggs, 1/2C sugar, 1 1/2 tsp salt, and 1/2 tsp freshly grated nutmeg. 

My friend, Amy, brought this fresh nutmeg back straight from Guyana just for me!! She is the best! It comes in a shell (just like any other nut - which I did not know when I got these!), so be sure to crack it before trying to grate it. Yes, I tried that. Let me just say, nutmeg shells just don't grate well. (Ignore the expiration date! I keep them in my freezer, so they are still fabulous!) But do not worry! If you don't have a friend going to Guyana anytime soon, or if you can't find this in the grocery store, just use some already ground nutmeg from the spice section!


By now, your milk should be cooled and your yeast should be well risen. Add it all to your lovely bowl. Then start mixing in 5 1/2C plain flour. You're going to have to mix it about a cup at a time, and it gets pretty thick. So when you can't use your whisk anymore, just get your hands in there and get them messy! 


Now you need it to turn into a lovely dough ball. So start adding more flour and mixing in by hand. All total, I used 7C of plain flour in this batch, but yours could end up with more or less depending on things like the weather and humidity in your house. When you finish, though, it should look like this - a lovely dough ball that isn't sticky anymore and stays altogether. 


Stick this baby on a counter and cover it with plastic. Leave it alone until it looks like it's about to rise out of your bowl. Like this...


Take the plastic off and give it a good punch down. Really get out some stress here!


Take a sharp knife and cut it right down the middle. Unless you have a ton of counter space (which I do not!), you will need to make 2 rolls out of this dough. I actually use the top of my stove to roll my dough, because it's a nice, big area. And it just barely fits. 

Roll out one chunk of that dough into a long rectangle. (Be sure to cover your bowl back up, so the other dough chunk doesn't dry out.) 

** Please notice my amazing rolling pin. My amazing Mr. Right hand turned this lovely thing on his wood lathe for me several years ago. It is my favorite rolling pin ever! He's the best!


Take a second to mix up your filling, if you haven't done it already. To make the pecan praline, you need a stick of butter, a cup of chopped pecans, and a cup of brown sugar. If you really love this stuff, make a double batch! Use a pastry cutter or just your fingers to mix all of this up really well. 

Use a few Tablespoons of vegetable oil or melted butter to give your dough a good rub down. You want something that your filling will stick to, so get that oil/butter all over the top of that rolled out dough. 

Sprinkle cinnamon and sugar mixture all over the top of the dough. Remember that you have another chunk of dough to roll out after this, so be sure to divide your filling in half. Or just make more. Or make the second roll just cinnamon and sugar. Lots of options here, people! 

Take your pecan praline filling and put it on half of the dough. You're only going to put it on half, because, as you roll it up, it sometimes tries to sneak out the other side. You need room on your roll to avoid this catastrophe! Go slow, work from one of the long sides, and start rolling up the dough. 


Now that you have a nice, long roll, grab a really sharp knife. Cut the roll into slices about 1 inch wide. Lay the circles on a greased pan. Spray the tops of the rolls with Pam and cover them with plastic. Stick them on the counter and let them rise until they are about double in size. This will take about an hour. 


After these had risen as much as I wanted them to, I put some of my pecan praline filling on top of each one. As they cook, the butter would melt into each roll and leave a sugary, buttery goodness!


Into the oven they go! Cook them at 375 degrees for about 20-25 min. I always use at least one glass pan, so I can see the bottoms. If the bottoms are golden, they are done! 

While these babies are cooking, take a minute to mix up an icing glaze. All you need is about a cup of powdered sugar and a couple Tablespoons of milk. Use enough milk to make it as thick or thin of an icing as you'd like. And if you get too much milk, no worries! Just add a little more powdered sugar! You can really never have too much icing!

After they come out of the oven, pour your glaze on them immediately. The hot sweet rolls will suck that icing right in, and it will be just fabulous! This is the finished product!


Thankfully, this recipe makes several pans of sweet rolls!! Because my children were standing around watching them cook and waiting until the moment I pulled them out, so they could grab one for a snack! And then we had them again for breakfast this morning!

There are lots of variations to this recipe. If you don't live where you can easily get pecans, use walnuts. If you don't like nuts, go with just cinnamon and sugar. You can really fill these sweet rolls with any number of things! 

If you give these a try, I'd love to hear how they turn out for you. And how your family loved them. And how your weekend was just perfect because you took some time to cook for your family. 


Pecan Praline Sweet Rolls

1 C milk
1/4 C real butter

2 packages active dry yeast
1 Tablespoon sugar
2/3 C warm water

1/2 C sugar
2 eggs
1 1/2 tsp salt
1/2 tsp freshly grated nutmeg

5 1/2 C plain flour (plus more for kneading)

Filling: 
1 C chopped pecans
1 stick butter
1 C brown sugar

Directions:
Scald milk. Remove from heat and add butter. Allow to cool completely. 

Mix together yeast, sugar, and water, and let rise for 5-10 min or until very bubbly.

In a large bowl, mix together remaining sugar, eggs, salt and nutmeg. Add in bubbly yeast and cooled milk/butter mixture. 

Mix in flour, 1 C at a time. After mixing in the 5 1/2 C, begin kneading in extra flour, 1 C at a time, until you get a smooth, elastic dough that is no longer sticky. Allow to rise until doubled, about 1-2 hours. 

While dough is rising, mix up the filling. Using a pastry cutter, fork, or fingers, mix together the butter, brown sugar, and pecans until you have a nice crumble that is well incorporated. 

When dough has risen, punch down. Cut the dough in half. Roll out one half of the dough into a rectangle. Oil top of dough, and add filling. Roll up into a long tube, and cut into 1" circles. Place on a greased baking sheet, cover, and allow to rise until sweet rolls are double in size. Repeat with remaining half of the dough. After rolls have risen, add extra topping, if desired, and put in a preheated 375 degree oven for 20-25 min. 

A powdered sugar icing/glaze can be added when the sweet rolls are taken out of the oven. Eat while hot, or cover and save for tomorrow's breakfast! 


Wednesday, July 20, 2016

Slow Food: Yeast Bread

One of my most favorite things in the whole world is baking homemade bread. It is heavenly. And the smell leaves my house smelling simply amazing. It's one of the few things in this life that I am actually really good at. But it wasn't always that way.

I remember shortly after Mr. Right and I married deciding to try my hand at yeast bread. I knew nothing on the subject. Seriously. Growing up in the south, I could make a great pan of cornbread or homemade biscuits, but this was altogether different. I cannot even tell you how many loaves came out of the oven overcooked or under-cooked and doughy in the middle, or just went straight in the trash before ever even making it to the oven! But that smell..... It just kept calling to me! And I kept coming back over and over and over again to give it another try.

And then one day, it finally happened! All the recipes and instructions I had read finally made sense (mainly because I "accidentally" got it right, so I could actually see what they were talking about), and the perfect loaf of bread emerged from my oven! It was a happy day!

It took me several YEARS to actually get this bread making thing right. And even still, sometimes I still don't hit the mark with perfection. But most days, I can turn out a pretty amazing batch of homemade bread. I finally found a recipe in a cookbook that I actually LOVE, so it's the one I stick with now. I know it's good.

Several friends have asked for my bread recipe, so today I wanted to share it with all of you lovely readers. It's not a secret recipe. It came out of an Amish cookbook I bought on a trip with Mr. Right to Eureka Springs, AR several years ago. I love sharing it! Really though, most people just don't want to spend the 4+ hours it takes to make it. But if you want to try your hand at it, I encourage you to go for it! I promise, you will be glad you did!


First, you start with a great bowl! My mom bought me this lovely piece from a local antique shop a few years back. She knows I love antique dishes. It takes me back to a slower time. And really, they just had great patterns on their dishes back then!!


In a separate bowl or Pyrex measurer, you'll need 1C lukewarm water, 1 Tbsp brown sugar, and 2 Tbsp yeast. 
Tip #1: Lukewarm water means warm bathwater temperature. Nice and warm, but not hot at all. Better to be too cool than too hot, because you will kill your yeast. You'll know it's dead if it doesn't start getting bubbly within a few minutes. 
Tip #2: I am currently using Platinum brand yeast, but only because it is what was on sale at my grocery store. Any good active-dry yeast will work great. Each packet contains 1 Tbsp, so you'll need 2 packets for this recipe. (I made half a recipe, so the pictures will reflect this.)


The warm water wakes up your yeast, and the brown sugar feeds it. It causes the yeast to then give off gasses which make it bubbly. This is what makes your bread rise and causes it to be nice and fluffy. So give your yeast/sugar mix at least 5 min to start getting nice and foamy. It should look like this.


While you're waiting on the yeast to rise, grab your lovely bowl again and start mixing up your dough. You'll need 1C sugar, 1Tbsp salt, and 1/2C oil. Give it a good stir with a whisk. Then add a quart of lukewarm water and stir it all together well. Add in 4 cups of plain flour (NOT self-rising!) and mix well. 


At this point, your yeast should be ready. Pour it into your lovely bowl and mix it in with the flour mixture. 


Add 3 more cups of plain flour to this bubbly mixture. 

You should be noticing that the dough is super sticky and you can't really mix it anymore with that whisk. Ditch the whisk and start using your hands. This is the fun part, people, so get your hands in there and get mixing! 

Keep adding flour, about 1C at a time, and mixing well. There really is no specific amount of flour to use. It depends on several things, like the weather. Seriously. So don't freak out over that fact. Just keep mixing in flour until your dough isn't sticky anymore, your fingers are relatively clean, and the dough pulls away from the sides of the bowl easily. You are going for a dough that isn't sticky and is resembling of a rubber band. Trust me, you'll know it when you get there! 

And no worries if you don't add enough flour. Your bread will just have a few more holes in it. Or if you add too much flour, it will be a little more dense. But it will still be edible! Just make notes for the next time you bake bread and adjust accordingly. 

Once you get all your flour mixed in, you'll need to give your bowl a good oiling. Super simple! Just lift your dough with one hand, and pour in some vegetable oil using the other. A couple of tablespoons is enough. Lay your dough back into the bowl and give it a good turn. Keep turning it over until it's coated with oil all over. This keeps it from sticking to the bowl or the covering you put on it while it's rising. 


Put a wet towel or some plastic wrap over the top, and set this baby aside to rise in a nice, warm place. I usually move mine to my laundry room, since it's usually quite a bit warmer in there than the rest of my house. But really, just leaving it on your counter will do fine. 

Let it rise for a few hours until it is doubled in size. It should be trying to grow out of the top of the bowl. At this point, give it a good punching down several times. Set it aside again for a second rise. 

When it has doubled in size for the second time, take off the covering and punch it down one last time. Using a sharp knife (or your hands to pull the dough apart), cut it in 5-6 equal pieces. (This recipe makes 5-6 loaves of bread!) Put the dough in loaf pans that have been sprayed with Pam. Cover them and let them rise until they are peeking over the tops of the pans. 

Side note: If you don't have 5-6 loaf pans (I don't!), you can also bake in batches or use a 9X13 pan to make rolls! 

When your dough has risen to the tops of the pans, start heating your oven to 350 degrees. After it's preheated, bake the loaves for 30-35min. 

Something to remember - the tops will be brown before it's actually finished cooking. I like to bake at least one loaf in a glass pan, because I can see the bottom. When the bottom is nice and brown, THEN it is ready! If you take it out too soon, the middle will be doughy. Trust me, you don't want this! Here is what your finished product should look like!


As soon as I take my bread out of the oven, I slather it with melted butter. REAL butter! And lots of it! The warm bread just sucks it right up, and it is just fantastic! You will definitely want to cut a slice immediately to eat. Be prepared to share with the others in your household, though, because the smell while this is baking will be calling to them! 

This recipe makes 5-6 loaves of bread. Sometimes I make the whole recipe, and sometimes I cut it in half. Most of the time, I give at least one loaf away. This beautiful loaf pictured above was a gift to a sweet friend at church. I have used this bread as thank-you gifts for any number of things. Or "just-because" gifts, because really, it's fun to just give a gift for no reason at all! 

This is one of my favorite slow foods ever! I hope you'll give it a try, and then come back and let me know how it turned out! And if you have any questions or problems with your bread making endeavors, I'd be happy to help you out. Bread making really is an art, and I absolutely LOVE seeing people try their hand at it! 

Monday, July 18, 2016

Slow Food: Cold Brew Coffee

Slow foods are becoming a bit of an obsession to me these days. I just love taking my time making a meal (or putting it in my crockpot and letting it do the long work for me), thinking about my family who will eat this slow food, and imagining the great conversations and memories we will make while eating said food. It makes me happy.

A few days ago, my world was forever changed. In the most amazing way ever!! I discovered another slow food, which actually isn't "food" at all. I stumbled upon cold-brew coffee. OH MY WORD! Why didn't someone tell me about this many years earlier! I am a serious coffee lover, and this slow way of making it has just increased that love exponentially! 

It all started last weekend when we decided to go camping. In July. Crazy hot!! I MUST have my coffee in the morning, but with the ridiculous heat in the Deep South these days, I just couldn't imagine myself brewing a cup of hot coffee and sitting outside in the heat to drink it. So I purchased a $5 bottle of cold coffee to bring along. By the time we got back home from the state park, the jug of coffee was gone and I was left thinking about having a nice cup of hot coffee the next morning in my kitchen. Still hot. Still a no-go! I needed more cold coffee!! Like, for the rest of the summer!

My original plan was to make several pots of coffee, let them cool down, and stick them in the fridge to pour over ice the next morning. But after doing some checking around, I learned the fine art of cold-brew coffee! It takes a full 24 hours to make, so don't think you're going to whip this out before heading out to work. Plan ahead. Believe me, it's totally worth it! Especially since it didn't heat up my kitchen to make it! The taste is smooth and less acidic, and it's just plain awesome. Here is the step-by-step so you can make your own slow coffee. You are welcome. 

First things first. Start off with a great coffee! Don't skimp on this one, or you're not going to be as happy with the results. With this much time and waiting, you really want it to be amazing with the first sip! Seattle's Best (#4, organic, and fair-trade) has become my favorite coffee as of late. It's a really fine ground, so you get more of the good flavor out of it than, say, a course ground coffee. If you've never tried this stuff, head to your nearest WalMart and pick up a bag for about $5.50. 


Dump all 12oz (the WHOLE bag!), into a large container where you plan to brew it. Seriously, the biggest container I have is my crockpot. So that's what we're going with. It doesn't really require anything special, so just use what you've got. Look at all that loveliness..,,.,


Add to the grounds COLD water (or room temperature). The ratio is 1 cup of water for 2oz of coffee. So if you want to make more (why not!) or less (seriously, why would you do that?), just adjust the amounts. For my 12oz bag, I added 6 cups of room temperature filtered water. Give it a stir to make sure all the grounds are nice and covered with water. At this point, it just looks amazing. And it has a slight chocolate smell, which is really just a bonus! 


Put the lid on your container and sit it in a place where you can leave it for about 24 hours. I did, in passing, give it a stir a few times in that 24 hours, just to make sure it was brewing nicely and to smell it!  


After 24 hours, strain off the coffee. I did this with a strainer lined with a thin flour sack towel. You can get this at WalMart for $1, and it is perfect for letting the good stuff through and getting out the grounds. Pour it all into a large tea pitcher or other storage container, and pop it in the fridge. After you pour a tall glass for yourself, of course! 

To make it sweet, add sweetened condensed milk to your taste. It's already liquid, so it mixes in with the cold coffee much easier than sugar. Add a splash of milk (as much as you'd like), a couple of ice cubes (or you can leave them out), and a straw. Grab a good book, find a quiet place to relax for a few minutes, and go enjoy your cold brew coffee! It is so worth the wait!